If you encounter the case that the WAVLINK outdoor Wi-Fi range extender cannot be powered on, here are the troubleshooting steps.
Part 1: Hardware Connection
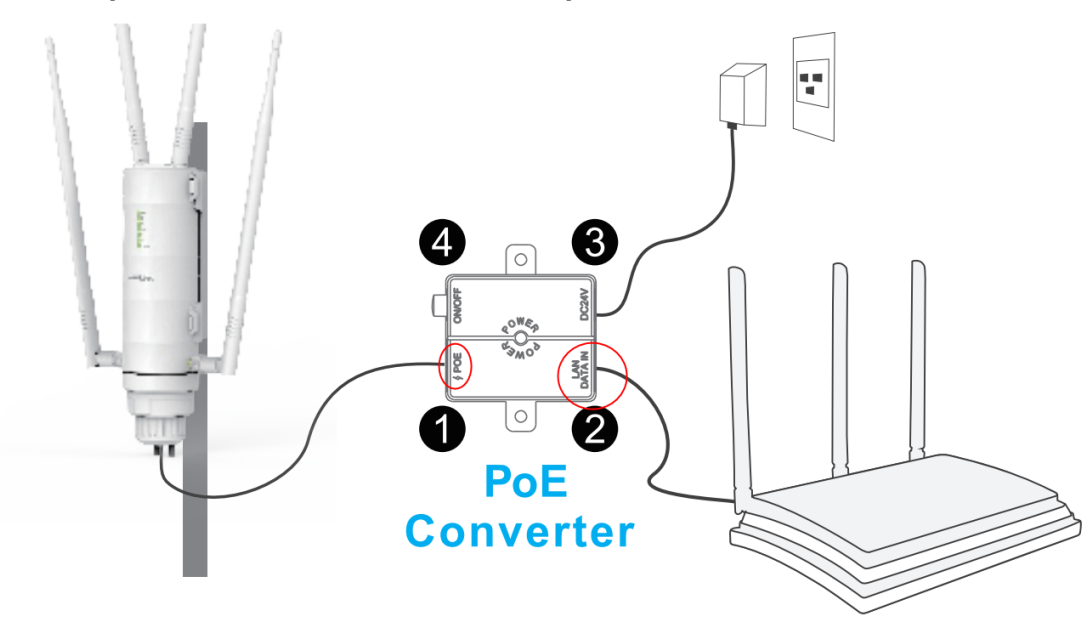
1. Insert the included power supply into the POE adapter and power socket.
Note: Since the WAVLINK outdoor Wi-Fi range extender uses a non-standard(Passive) POE adapter and the built-in POE adapter is not compatible with 802.3at and 802.3af protocols, it cannot be replaced by a POE switch from other manufacturers.
2. Press the power button on the POE adapter, then the "Power" indicator on the POE adapter will show solid green.
3. Connect the WAVLINK outdoor Wi-Fi range extender to the POE adapter through a Cat5e Ethernet cable that comes with the device. Connect one end of the network cable to the "POE" interface on the POE adapter, and connect the other end to the "POE" interface at the bottom of the device.
Note: In order to power on the WAVLINK outdoor AP conveniently, it may be necessary to replace the Cat5e network cable that comes with the device. However, the length of the network cable must not exceed 60 meters, and the specification of the network cable must meet the standard of Cat 5e or later.
4. After power on, the power indicator light on the device will light up .
Part 2: Accessories Check
1. Instead of using the Ethernet cable that comes with the device, replace it with another Category 5e or onward Ethernet cable.

2. Change another DC24V power adapter or DC24V 0.5 passive POE adapter.
Note: The WAVLINK outdoor Wi-Fi range extender is only compatible with passive DC24V 0.5A POE adapter and does not support 802.3af/at wired standard. Please take the place of the POE adapter with another DC24V passive POE adapter.
Get the Scoop First
Subscribe to our official website to receive exclusive first-hand news and stay up-to-date on our new product releases and promotions!