Wavlink AX1800 Setup

Wavlink AX1800 Setup

The Wavlink AX1800 extender is an easy-to-use device that can provide you with a strong internet signal even in WiFi dead zones. Essentially, it acts as a repeater to extend and broaden the range of your existing router. Although you can perform Wavlink AX1800 setup on your own once you have the key information about the configuration process.

Wavlink AX1800 Product Features And Overview  
WAVLINK AX1800


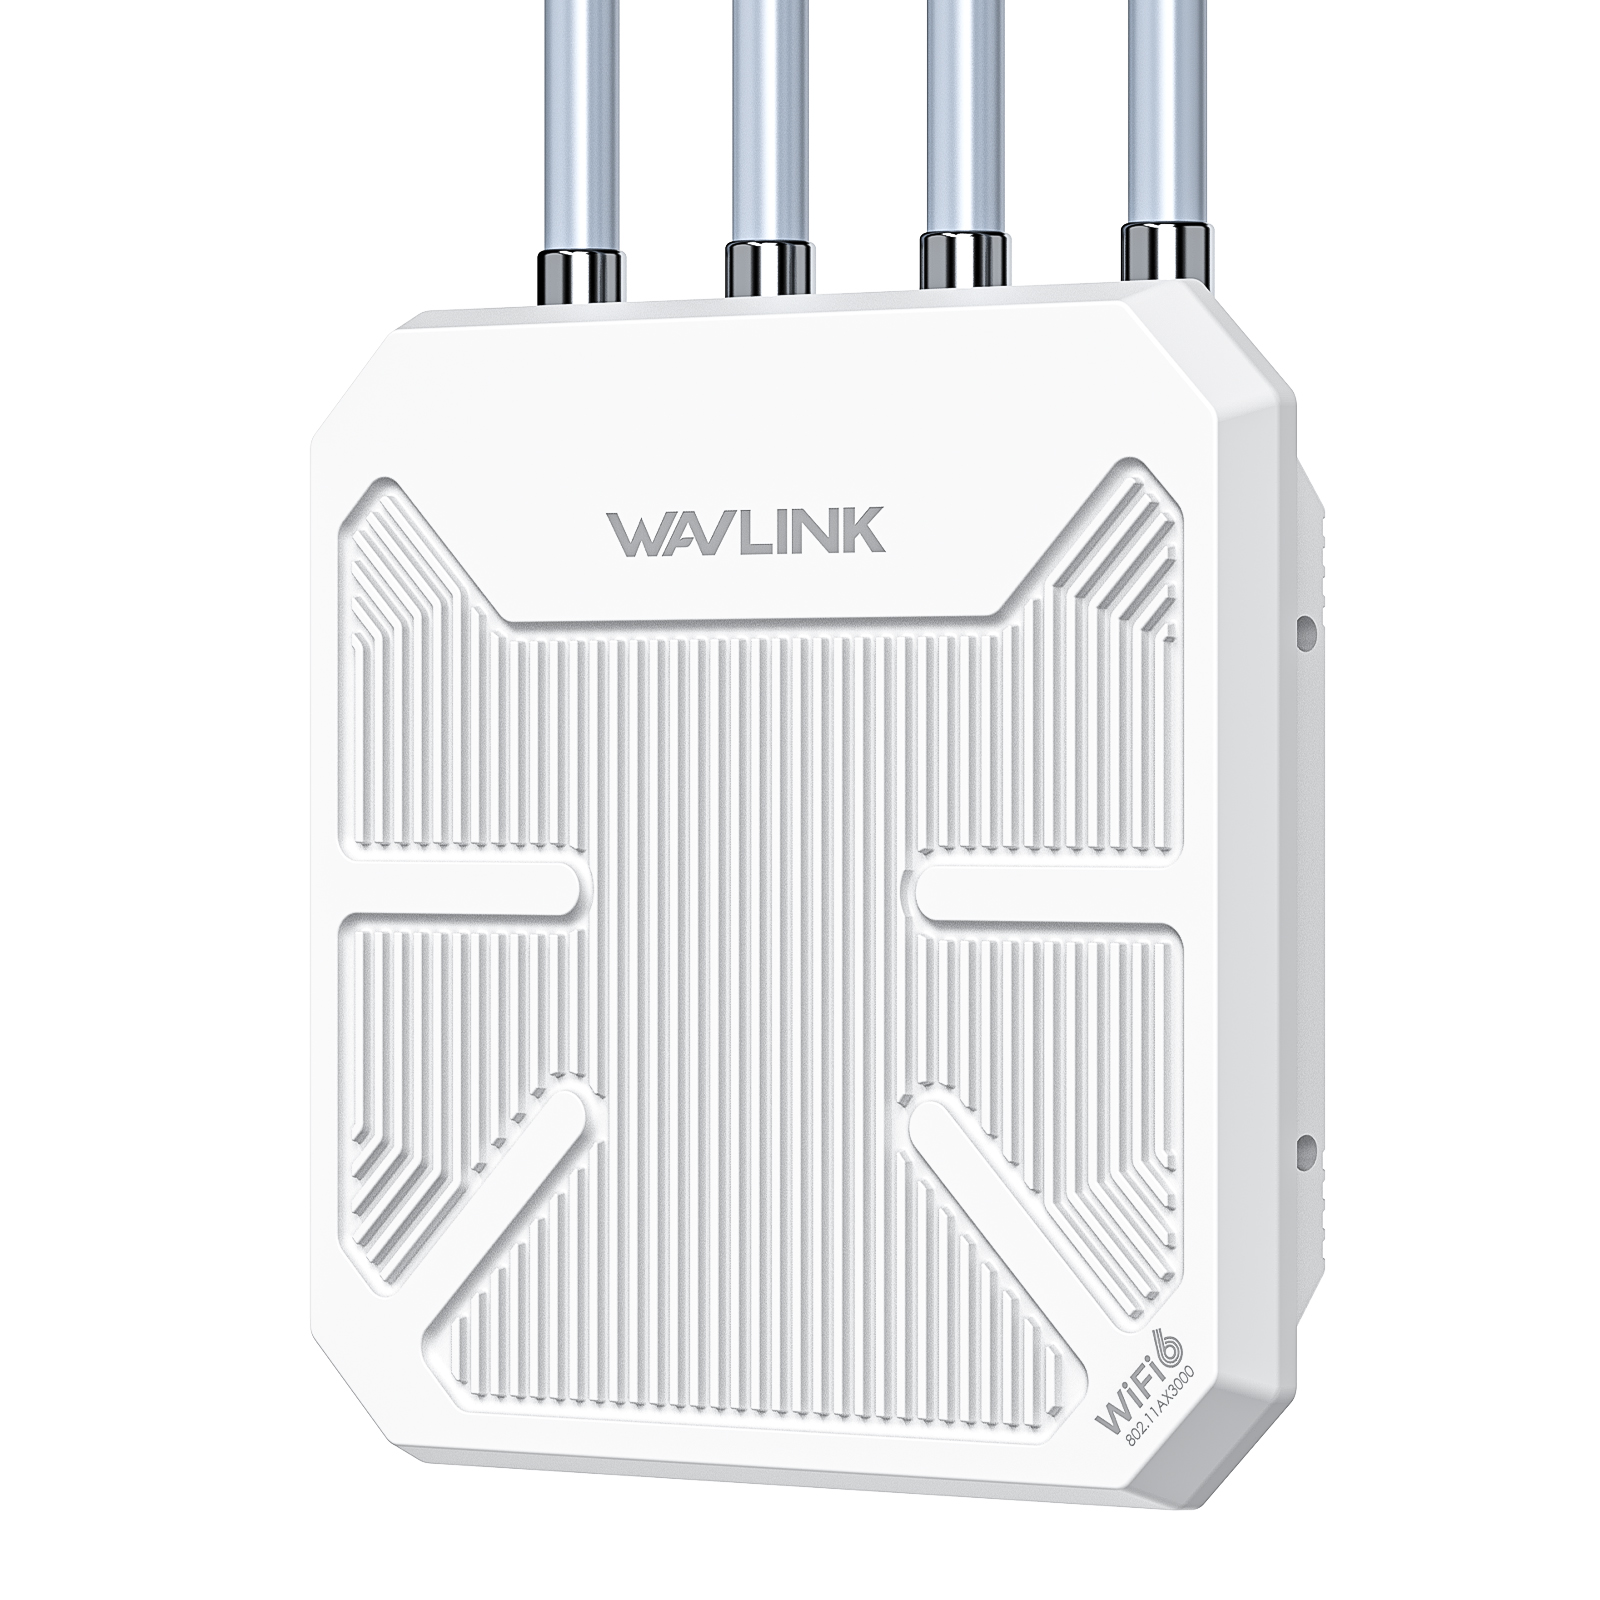
The Wavlink AX1800 device supports both the new WiFi standard 802.11AX as well as the 2.4 GHz and 5 GHz frequency bands. These bands provide a maximum internet speed of up to 1800 Mbps. Additionally, the built-in MU-MIMO technology allows users to connect multiple devices simultaneously.

When discussing its overview, it features two Gigabit Ethernet ports for wired connections. Additionally, there is a built-in intelligent indicator that can detect and display signal strength. Finally, there's a WPS button for Wavlink AX1800 setup and a reset button for restoring the extender to its factory settings.


Wavlink AX1800 Setup Manual Method

The Wavlink AX1800 setup process doesn't require any web or IP address and login credentials; that's why it's a convenient method. To do this, use the WPS buttons on the Wavlink AX1800 extender and the router.

  • After attaching the antennas to the extender, plug it into a power outlet.
  • Wait for the extender's LED to change color and be ready for setup.
  • Next, press the extender's WPS button and verify the LED indicators.
  • When the extender is ready to connect, press the router's WPS button.
  • Check the LED light colors on both devices, which will later become stable.
  • Finally, the LED will become steady, indicating that the Wavlink AX1800 setup is now complete.

Therefore, connect your other devices to the Wavlink AX1800 network and enjoy seamless internet speeds.


Do you need online service?
Please click on the contact icon on the right side of the website's sidebar for online communication support, including Facebook and WhatsApp.

Also you can also click on "Contact Us" to obtain more detailed information.


Wavlink AX1800 WiFi Extender Setup On Web-Based Portal


  • First, plug the extender into a power source and make it easily discoverable.
  • Next, take your device (it can be any mobile device or PC) and connect it to the extender's wireless network.
  • After that, launch any web browser on the network-connected device.
  • In the browser's search bar, enter Wavlink's default web or IP address.
  • Use www.wavlink.com for the web address and 192.168.10.1 for the IP.
  • After entering it, click Enter, and the login page will appear on the screen.
  • For login credentials, use "admin" for both the username and password.
  • Finally, choose your preferred language and follow the on-screen instructions to complete the Wavlink AX1800 setup process.

Tip:  If you are using a PC or laptop, it's preferable to use a wired connection instead of a wireless one. This will provide a strong internet signal and connection.


Wavlink AX1800 Setup On The App

In addition to these setup processes, you can also use the Wavlink WiFi application to configure the Wavlink AX1800. For this process, install the Wavlink application from your device's app store.

  • Once the application installation is complete, proceed to the next step.
  • Open the application and click on the terms and conditions of the application before going to the login window.
  • The login window on the next page will prompt you to enter your username and password.
  • Enter these details and click "Login" to access the Wavlink AX1800 setup portal.
  • Upon reaching this portal, select the extender network and enter its password into the required fields.
  • When you do this, the Wavlink AX1800 setup will be completed, and the extender will be ready for use.

Troubleshoot The Wavlink AX1800 Setup Errors


Wavlink AX1800 Setup Errors

After completing the Wavlink AX1800 setup, you may encounter some errors while using it. To resolve them, use these tips based on the type of error.

  • First, check the setup LED and try to identify the source of the error.
  • Unplug the plugs of the extender and router from the power source and disconnect the devices.
  • Disconnect all these plugs, and after some time, plug them back in, and then reconnect your devices.
  • During this configuration, try using different locations and different web browsers.
  • Moreover, you can also use a new Ethernet cable for a wired connection.
  • Check for the latest firmware on the Wavlink AX1800 setup page.
  • Update to the latest firmware version (if available).


Reboot The Extender

As another troubleshooting tip, try restarting the extender, as there might be a temporary technical error. Remove the extender and the existing router from the power outlets. After a while, plug the extender back in, but this time, use a different power outlet. Additionally, try to position the extender away from metal and electrical appliances. Finally, connect your devices to it and check its functionality.

Update AX1800 Firmware

To improve the performance of your AX1800 after completing the Wavlink AX1800 setup, consider updating its firmware. Using a connected PC, check for the latest firmware file on the Wavlink AX1800 setup portal. If a new file is available, download it. Then, perform the firmware update process from the same page and assess the performance. Doing so is sure to help optimize the functionality of your extender.

The specific model of AX1800 is 583AX1, and it has a very catchy name: AERIAL D4X. You can click on 583AX1 firmware url to directly access the firmware page.


Reset The Wavlink AX1800 Extender

After following these steps, if the extender continues to experience issues, consider performing a reset. To do this, disconnect the device from the extender and locate the reset button on the extender. Next, press the button until the LED starts flashing. Now, let the device perform the factory reset process. After resetting the device, go through the Wavlink AX1800 setup again.

We hope that by using these installation and troubleshooting tips, you'll be able to set up and use the Wavlink AX1800 correctly. If you have any questions about the process, please contact our team for solutions.

Get the Scoop First

Subscribe to our official website to receive exclusive first-hand news and stay up-to-date on our new product releases and promotions!